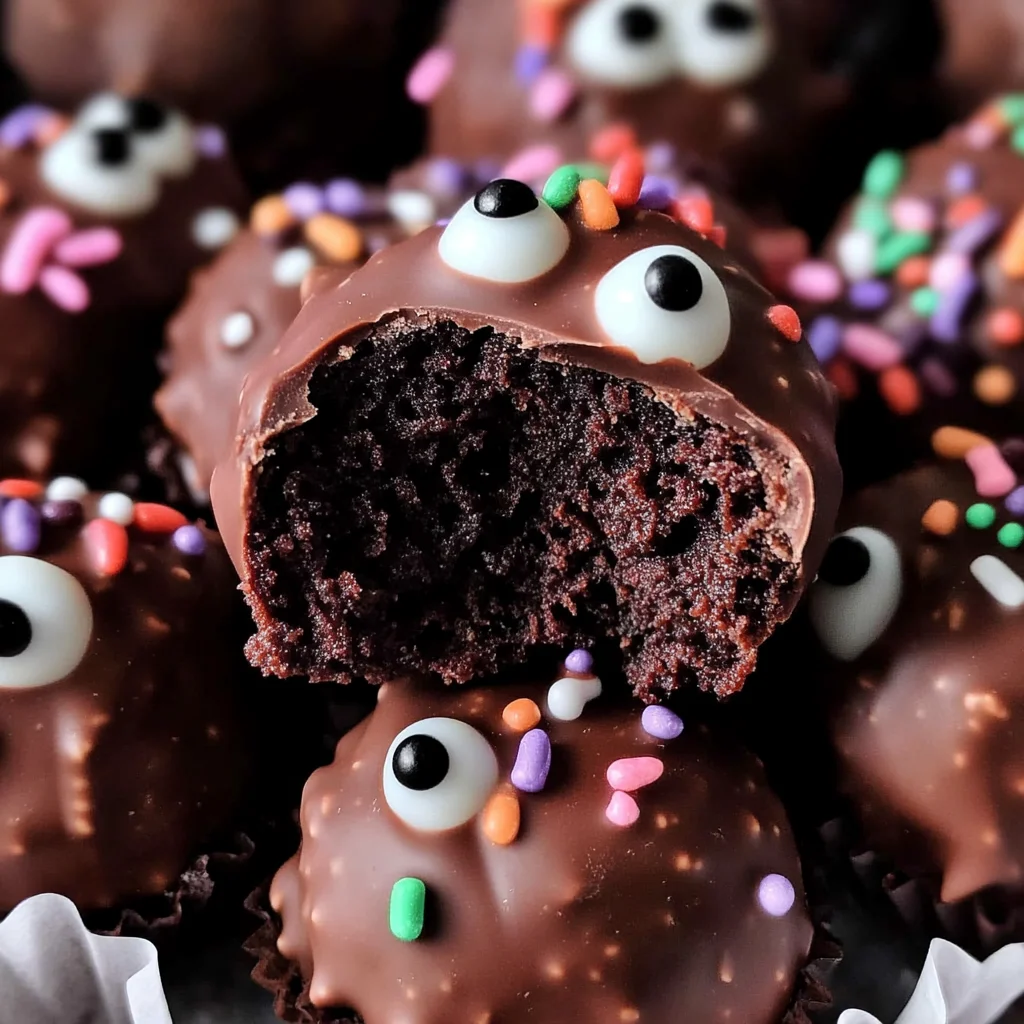
Double Chocolate Brownie Truffles (3 ways!)
These Double Chocolate Brownie Truffles (3 ways!) are the ultimate treat for chocolate lovers. With rich flavors and a fun, bite-sized form, they are perfect for any occasion. Whether you’re celebrating Halloween, Christmas, or a birthday, these truffles can be beautifully decorated to match the theme. Plus, they can easily be made gluten-free, making them a versatile dessert option that everyone will enjoy!
Why You’ll Love This Recipe
- Decadent Flavor: Each truffle is packed with rich chocolate, making every bite an indulgent experience.
- Customizable: You can decorate these truffles in various ways to suit any celebration or personal preference.
- Easy to Make: The preparation is straightforward, allowing even novice bakers to create impressive treats.
- Gluten-Free Option: Simply substitute with gluten-free oat flour for a delicious alternative that caters to dietary needs.
- Perfect for Sharing: With 12 servings, these truffles are ideal for parties or as gifts for friends and family.
Tools and Preparation
Before you dive into making these delightful truffles, gather your tools. Having everything on hand will streamline the process and make it more enjoyable.
Essential Tools and Equipment
- Mixing bowl
- Baking sheet
- Parchment paper
- Whisk or electric mixer
- Rubber spatula
- Small cookie scoop
Importance of Each Tool
- Mixing bowl: A sturdy mixing bowl is essential for combining ingredients smoothly without spills.
- Baking sheet: This helps in cooling the truffles evenly after shaping them.
- Parchment paper: Lining your baking sheet prevents sticking and makes cleanup a breeze.

Ingredients
For the Brownie Base
- 1/2 cup (1 stick) Nellie’s Free Range Unsalted Butter
- 1 cup dark chocolate chips
- 3/4 cup sugar
- 1/2 teaspoon salt
- 2 teaspoons vanilla extract
- 2 large Nellie’s Free Range Eggs
- 1/2 cup all-purpose or whole grain oat flour
For Topping Options
- 1 1/2 cups chocolate chips, chopped chocolate, or candy melts
- Holiday: white and silver nonpareil sprinkles; crushed candy cane pieces
- Halloween: candy eyes and/or chocolate sprinkles
- Classic: multi chocolate drizzle, white chocolate, milk chocolate, dark chocolate, and/or colored candy melts
- Flavored: chopped nuts, cocoa nibs, sea salt
- Traditional: cocoa powder
How to Make Double Chocolate Brownie Truffles (3 ways!)
Step 1: Prepare Your Baking Sheet
Start by lining your baking sheet with parchment paper. This will help prevent the truffles from sticking once they are formed.
Step 2: Melt the Chocolate and Butter
In a medium saucepan over low heat:
1. Combine the butter and dark chocolate chips.
2. Stir continuously until melted and smooth. Remove from heat.
Step 3: Mix Dry Ingredients
In a mixing bowl:
1. Whisk together sugar, salt, vanilla extract, and eggs until well combined.
2. Gradually add the melted chocolate mixture while stirring.
Step 4: Add Flour
Fold in the oat flour gently using a rubber spatula until just combined. Be careful not to overmix to keep the truffles light.
Step 5: Bake
Pour the brownie batter onto your prepared baking sheet:
1. Spread evenly with a spatula.
2. Bake at 350°F (175°C) for about 36 minutes or until a toothpick inserted comes out mostly clean.
Step 6: Cool and Shape
Once baked:
1. Allow brownies to cool completely on the baking sheet.
2. Once cooled, crumble them into small pieces in a mixing bowl.
Step 7: Form Truffles
Using a small cookie scoop:
1. Take portions of brownie crumbs and shape them into balls.
2. Place each ball back on the lined baking sheet.
Step 8: Coat the Truffles
Melt your choice of chocolate chips or candy melts in a microwave-safe bowl:
1. Dip each brownie ball into melted coating using forks or spoons.
2. Let excess coating drip off before placing back on parchment paper.
Step 9: Decorate
While still wet:
1. Add your desired toppings like sprinkles or crushed candy canes for festive flair.
Step 10: Chill
Refrigerate the truffles for about an hour until set before serving.
Enjoy your homemade Double Chocolate Brownie Truffles (3 ways!), perfect for any festive occasion!
How to Serve Double Chocolate Brownie Truffles (3 ways!)
These Double Chocolate Brownie Truffles are versatile and can be served in various delightful ways. Whether you’re celebrating a holiday or hosting a casual get-together, there’s a perfect presentation for every occasion.
Holiday Presentation
- Festive Sprinkles: Decorate your truffles with white and silver nonpareil sprinkles or crushed candy cane pieces for a cheerful holiday touch.
- Gift Boxes: Place truffles in decorative boxes or tins, making them a beautiful gift for friends and family during the festive season.
Halloween Fun
- Candy Eyes: Add candy eyes to your truffles to create spooky treats that are sure to delight kids and adults alike.
- Chocolate Sprinkles: Use dark chocolate sprinkles for a classic Halloween look that complements the rich chocolate flavor.
Classic Touch
- Chocolate Drizzle: Drizzle multi-colored chocolate over the truffles for an elegant appearance that enhances their decadent taste.
- Nuts and Sea Salt: Top with chopped nuts or a sprinkle of sea salt to add texture and enhance the chocolate richness.
How to Perfect Double Chocolate Brownie Truffles (3 ways!)
Making your Double Chocolate Brownie Truffles perfectly delicious requires attention to detail. Here are some tips to ensure your truffles turn out amazing every time.
- Use Quality Chocolate: Choose high-quality dark chocolate chips for a richer flavor that elevates your truffles.
- Cool Before Rolling: Allow the brownie mixture to cool completely before rolling into balls; this helps them hold their shape better.
- Experiment with Flavors: Incorporate different flavorings like almond extract or espresso to give your truffles a unique twist.
- Chill Between Steps: Refrigerate the rolled truffles briefly before coating them in chocolate or toppings; this makes handling easier.
- Storage Matters: Store your truffles in an airtight container in the fridge for up to two weeks to maintain freshness.
Best Side Dishes for Double Chocolate Brownie Truffles (3 ways!)
Pairing side dishes with your Double Chocolate Brownie Truffles can enhance the overall dessert experience. Here are some delightful options.
- Fresh Berries: The tartness of fresh strawberries or raspberries complements the sweetness of the truffles beautifully.
- Whipped Coconut Cream: Light and fluffy coconut cream adds an airy contrast, perfect for balancing rich flavors.
- Vanilla Ice Cream: A scoop of creamy vanilla ice cream provides a classic pairing that everyone loves alongside chocolate treats.
- Mint Leaves: Fresh mint leaves offer a refreshing burst of flavor that contrasts nicely with the decadence of chocolate.
- Nutty Granola: A sprinkle of nutty granola adds crunch and texture, making for an interesting contrast to smooth truffles.
- Coffee Brewed Freshly: A cup of strong coffee pairs wonderfully with chocolate desserts, enhancing their flavors and creating warmth.
Common Mistakes to Avoid
When making Double Chocolate Brownie Truffles (3 ways!), it’s easy to overlook key steps that can affect the final product. Here are some common mistakes to avoid.
- Ignoring ingredient temperatures – Using cold butter or eggs can result in a lumpy batter. Always let your ingredients come to room temperature for a smooth mix.
- Overmixing the batter – Overmixing can lead to dense truffles. Mix just until combined for a light, fudgy texture.
- Skipping the chilling time – Not allowing the mixture to chill can make it hard to form truffles. Be sure to refrigerate for at least an hour before rolling.
- Not using quality chocolate – Cheap chocolate can affect flavor and texture. Choose high-quality dark chocolate chips for the best results.
- Forgetting about decoration – Leaving out festive decorations can make your truffles less appealing. Customize with sprinkles or drizzles for a fun finish.
Storage & Reheating Instructions
Refrigerator Storage
- Store in an airtight container.
- Keep them in the fridge for up to one week.
Freezing Double Chocolate Brownie Truffles (3 ways!)
- Place truffles in a single layer on a baking sheet.
- Freeze for 2-3 hours, then transfer to an airtight container for up to three months.
Reheating Double Chocolate Brownie Truffles (3 ways!)
- Oven – Preheat your oven to 350°F and place truffles on a baking sheet, warm for about 5 minutes.
- Microwave – Heat truffles on low power in short bursts of 10-15 seconds until warm.
- Stovetop – Use a double boiler method, heating gently until they soften, stirring frequently.
Frequently Asked Questions
Here are some common questions about making Double Chocolate Brownie Truffles (3 ways!) that might help you get started.
Can I make these truffles gluten-free?
Yes! Substitute all-purpose flour with gluten-free oat flour to make delicious gluten-free Double Chocolate Brownie Truffles (3 ways!).
How long do these truffles last?
When stored properly in an airtight container, they can last up to one week in the refrigerator and up to three months in the freezer.
What are some decoration ideas for my truffles?
You can use sprinkles, crushed nuts, cocoa powder, or melted chocolate drizzles based on the occasion or your personal preference!
Can I use different types of chocolate?
Absolutely! Feel free to mix dark chocolate with milk or white chocolate based on your taste. Each type adds its unique flavor profile.
Final Thoughts
Double Chocolate Brownie Truffles (3 ways!) are not just rich and delightful; they’re also incredibly versatile. You can customize them with various flavors and decorations suitable for any celebration or mood. Give this recipe a try and impress your friends and family with these delectable treats!
Double Chocolate Brownie Truffles (3 ways!)

Indulge in the ultimate chocolate experience with these delectable Double Chocolate Brownie Truffles, available in three delightful variations! Each truffle is a rich, bite-sized treat that is perfect for any occasion, whether you’re celebrating a holiday or simply satisfying your sweet tooth. These truffles are easily customizable with festive toppings and can be made gluten-free by swapping in oat flour. With straightforward preparation steps, even novice bakers can create these impressive treats to share with friends and family. Get ready to elevate your dessert game!
- Prep Time: 20 minutes
- Cook Time: 36 minutes
- Total Time: 56 minutes
- Yield: Approximately 12 servings 1x
- Category: Dessert
- Method: Baking
- Cuisine: American
Ingredients
- 1/2 cup unsalted butter
- 1 cup dark chocolate chips
- 3/4 cup sugar
- 1/2 teaspoon salt
- 2 teaspoons vanilla extract
- 2 large eggs
- 1/2 cup gluten-free oat flour
- Optional toppings: chocolate chips, sprinkles, crushed candy canes
Instructions
- Preheat oven to 350°F (175°C). Line a baking sheet with parchment paper.
- Melt butter and dark chocolate chips over low heat until smooth; remove from heat.
- In a mixing bowl, whisk together sugar, salt, vanilla extract, and eggs. Add the melted chocolate mixture gradually.
- Gently fold in oat flour until combined. Pour batter onto the prepared baking sheet and spread evenly.
- Bake for about 36 minutes or until a toothpick comes out mostly clean. Cool completely.
- Crumble brownies into small pieces and form into balls using a cookie scoop; place on the lined baking sheet.
- Coat truffles in melted chocolate or candy melts; decorate as desired.
- Chill for one hour before serving.
Nutrition
- Serving Size: 1 truffle (30g)
- Calories: 130
- Sugar: 12g
- Sodium: 50mg
- Fat: 7g
- Saturated Fat: 4g
- Unsaturated Fat: 3g
- Trans Fat: 0g
- Carbohydrates: 15g
- Fiber: 1g
- Protein: 2g
- Cholesterol: 25mg